Waterfall Drapery
First published in 2005, republished 2016.
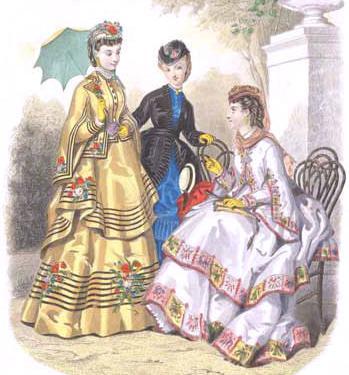
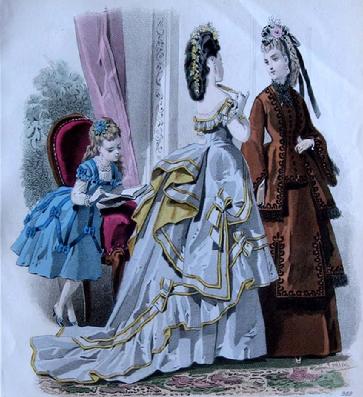
The waterfall is an extremely graceful type of drapery used in costumes depicting the mid-late Victorian era. They can be seen in many costumes in the stage production of The Phantom of The Opera and in movies such as Bram Stoker’s Dracula (Mina’s green silk dress when she first meets Dracula in London). They are even used in non Victorian costuming such as Star Wars (one of Padme’s night dresses in Episode III.)
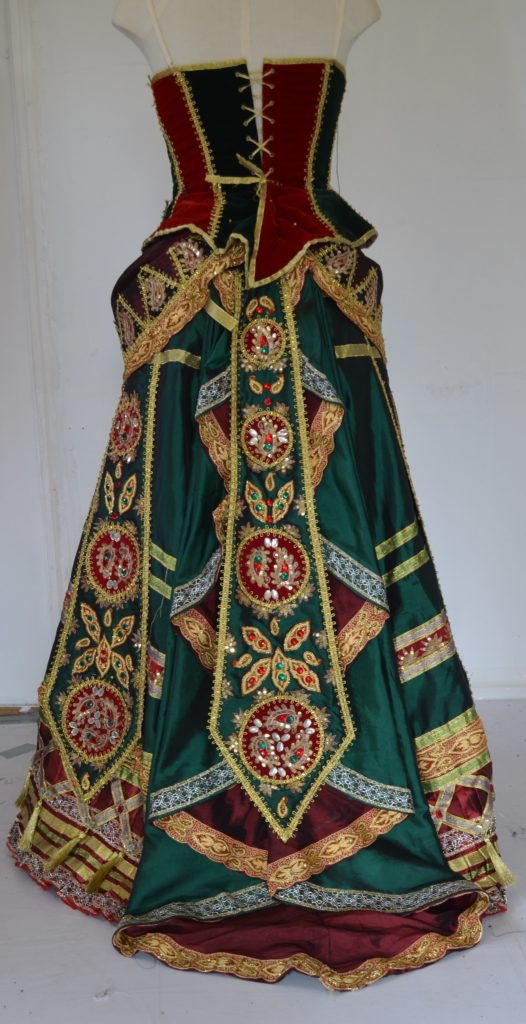
I have used the basic pattern to make both of my full sized garments, but there are many ways to individualise these.
In my trial and error I had noticed that the top edge, that is pleated, and the curve of the free edge work together to create the flare and curve of the base shape. So I decided to test with graph paper to show how this worked. I used this new method to drape my Australian version Wishing Dress from Phantom of the Opera.
plotting the drapery

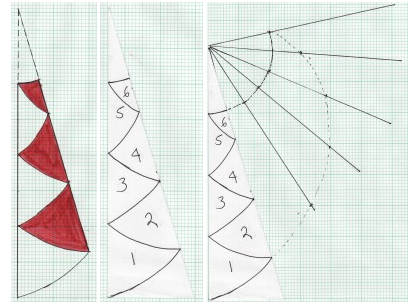
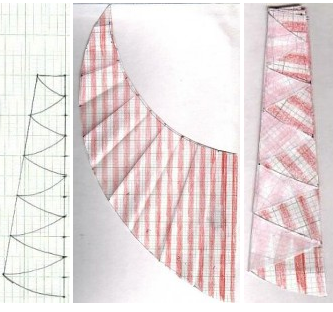
1) I first of all started by drawing what the final drapery would look like folded to shape, I used the colour blue to indicate the reverse side of the folds. If you have a photo of what you are aiming for this can help greatly as you can work with your measurements in place of the original, or adjust to what is most flattering to your proportions. I extended the lines of the sides to meet in an apex. This is to help align each fold in the diagrams.
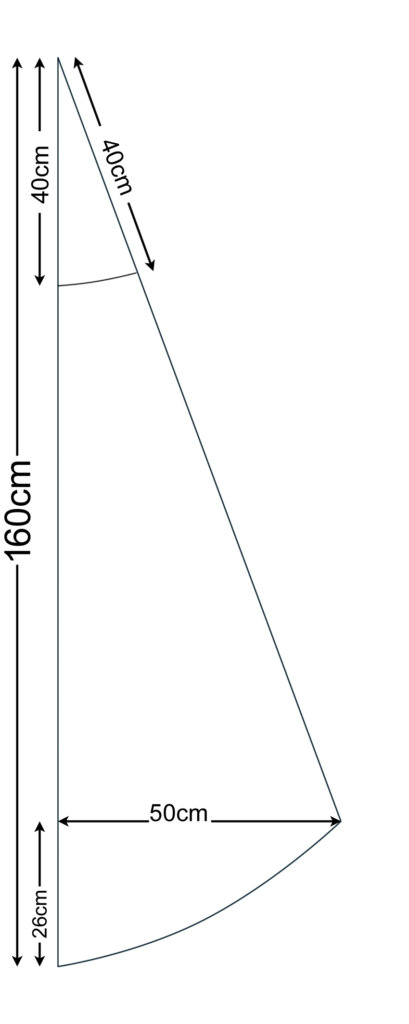
2) To create the pattern in scale I started by using the length of the CENTRE BACK line. I used 120cm for the length, added 40cm for the extended line, and out 50cm for the widest part. This happened to be 26cm from the bottom.
3) The drapery is essentially a flared pleat and thus the top is much narrower than the bottom of each fold. This results in a curved top and bottom edge. To make sure the folds are evenly and accurately drawn i extended 40cm down the diagonal line to create a waist edge approximately 15cm across.
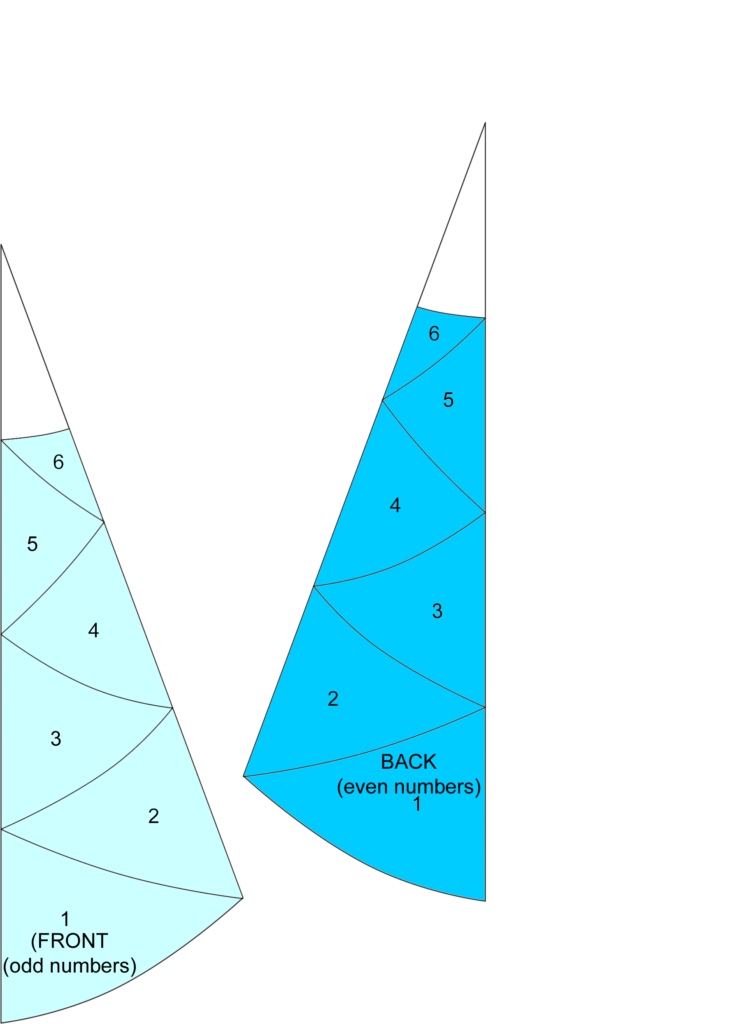
4) I draw this shape onto a piece of paper and indicate the folds by numbering each section from bottom to top. I do this on both sides of the paper. To illustrate this I have coloured the corresponding front and back of the shape- pale blue for the front, mid blue for the reverse
.
5) I start by placing the first fold on the paper and drew a line down the edges. This then matches up to the next section which is also marked on the paper. I repeat this until the last section is marked.

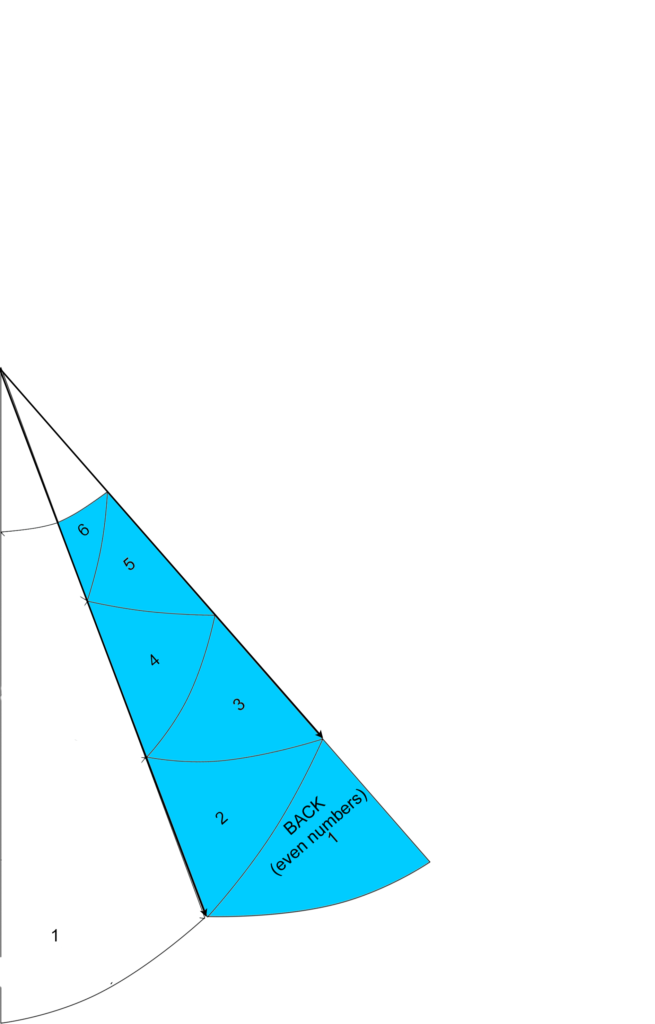
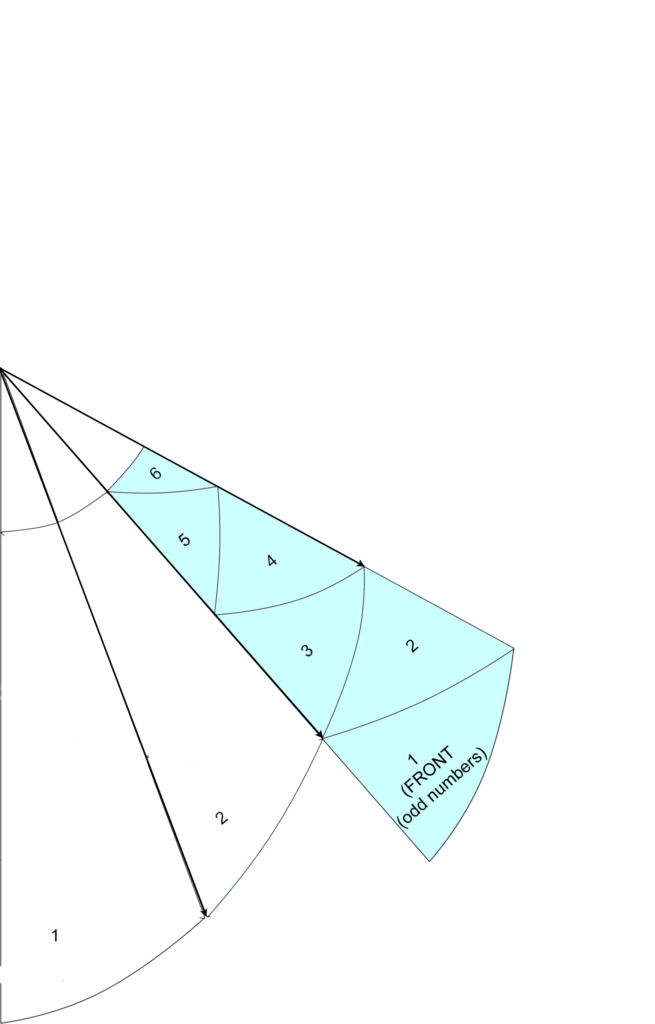


This line can then be smoothed and the amount of fabric needed for each half can be found. Note the lining will require the same amount of fabric.
variations
This basic method can work for any style of waterfall drapery you want. The method is the same but the repeating shape will be different depending on whether you want a greater or lesser number of folds and how flared or straight you want the shape to be.
The following shows how the drapery can be made to have few, shallow folds:
It’s also possible to cut a more pronounced curve at the waist and hem to produce a very heavily folded piece:
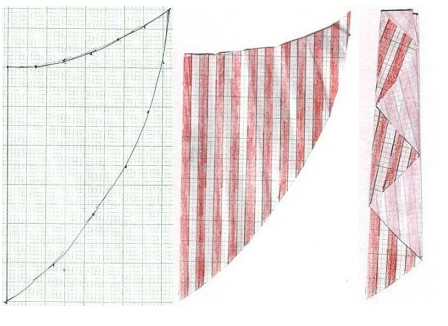
One can cut the striped fabric on the diagonal or across for different effects as well, for even more effective use of patterns of the fabric.
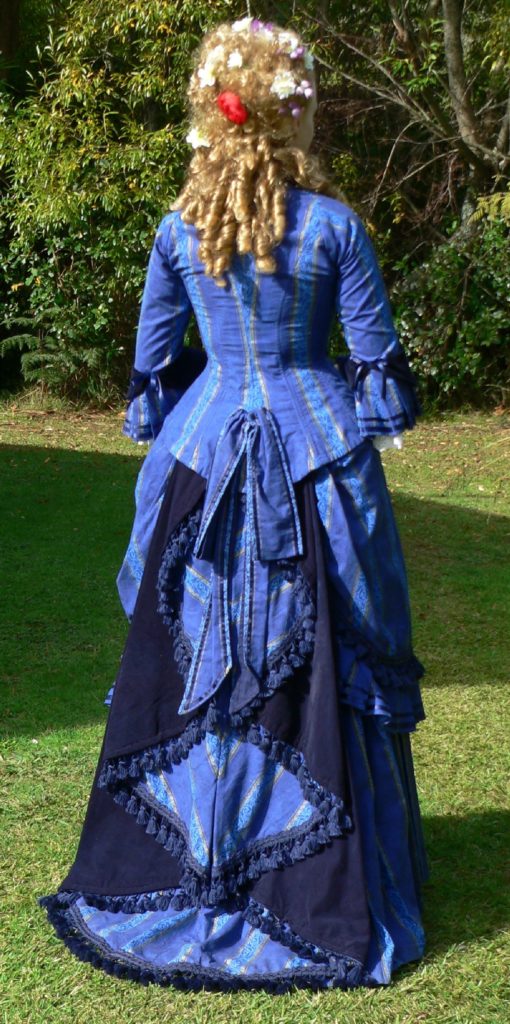
My first Blue Dress used a similar approach, which was to cut a narrow rectangle in the centre and triangular pieces down at the sides, cut on the bias so the stripes followed the lines of the hem.
Once you get a handle on controlling the flare, the number of pleats, you can incorporate those panels into other parts of drapery.
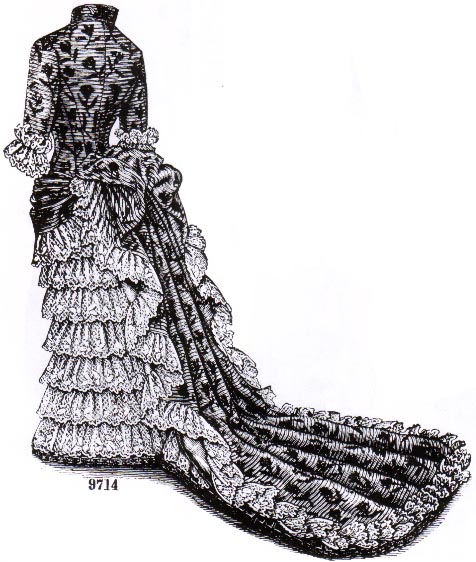
This train is an interesting mix of heavily gathered fabric that ends in a flat squared off train.
The sides of the train are very narrow waterfalls as you can see the folded edges of most.
The top of the train is much more complicated and is a result of folding the hem edge vertically and folding the extra fabric into a butterfly/bow shape.
Faux-riations
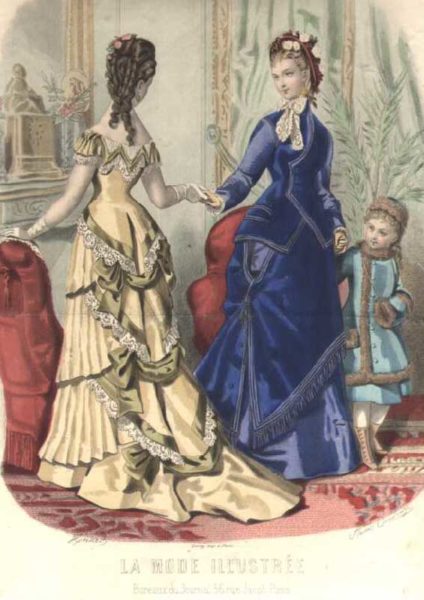
Some “water fall” pleats in extant fashion plates are not waterfalls at all.

The first here is simply a strip of fabric the top edge sewn vertically to the skirt and then the hem folded back and forth over the seam.
Interest is added in the form of fringing, gradually widening the strip, and backing it with another fabric.
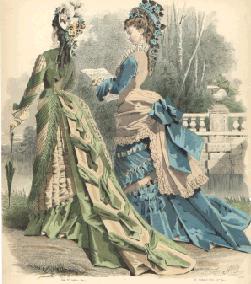
This plate shows a train that is made up of 2 matching oval shaped pieces, each pleated in the centre, and made to match the built in piece of the bodice.
This allows the tiered and pleated tablier layers to overlap the train pieces adding even more interest.
By using multiple contrasting ties over a narrow tube you can get the staggered effect of a waterfall.
The waterfall train/drape as we know it from film and tv is a wonderful modern take. The concept was commonly used for short pieces and by elongating it for the stage/screen the proportions and flow extend right to the hem of the train.